
|
|
Canning
|
|
Introduction |
|
| My experience with canning is fairly limited. It all started one day in October 2015 when I made my first batch of apple butter (yum). I sent a picture of my apple butter to my Mom and she told me that I should learn how to can it, so that I can save it for later consumption in a SAFE way. Until that conversation, I really just thought that as long as it was in a jar, and the jar sealed, that the food would last forever. Boy was I wrong! She opened my eyes to a whole new world. |
|
There seems to be a lot of interest in what I've done - I found myself answering the same questions over and over again as friends saw pictures of things I have canned, and the way I store or use them. So I decided to write this article to share my experiences in canning (including water bath canning, steam canning, and pressure canning).
**Note: It is important to use the correct method of canning, based on the type of food you are processing, in order to prevent life-threatening bacteria from forming in the food.
There are so many great advantages to canning your own food. Unlike store-bought packaged food, there are no artificial preservatives and you know exactly what goes into the jars of food that you have canned yourself. Until you taste it, you will not believe the difference in flavor - home-canned food tastes very fresh and much richer than commercially packaged food. It tastes almost as good as the fresh food (in some cases better), and preparing a dish from your stash of home-canned goodness takes much less time than preparing the dish from scratch, using fresh ingredients.
They say that canned food can be stored in a cool, dry, and dark space for a year or two. The truth is, you can store it for much, much longer than that, but the quality of the food may start to degrade slightly after that. With very rare exception, the difference in taste would be negligible and not noticeable, even after several years.
|
|
Water Bath Canning |
|
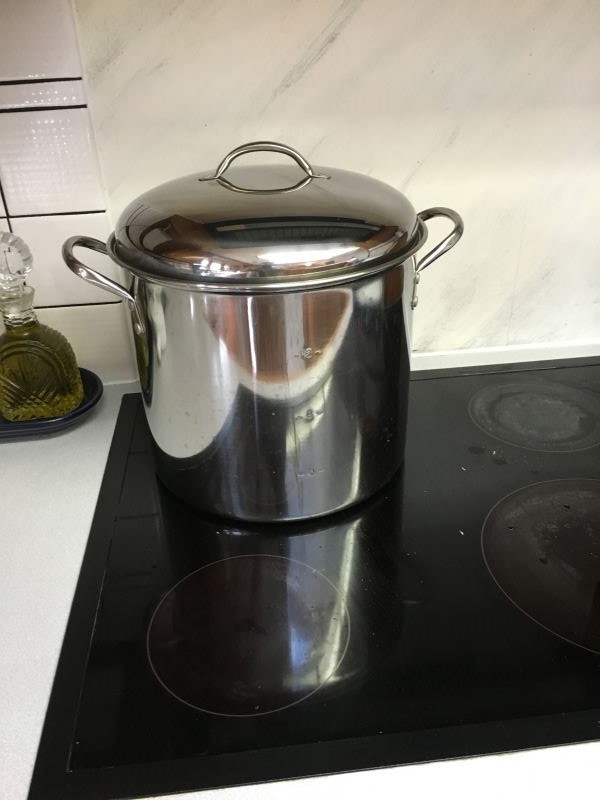
Equipment Needed
|
|
Foods you can Water Bath Can
Only foods with a high acidic content can be water bath canned. This includes the following:
- fruits and fruit juices
- jams and jellies
- salsas
- tomatoes
- pickles, relishes and chutneys
- most sauces, vinegars and condiments
Everyone has their own preferences and style when it comes to the details of actually processing the food in the water bath canner. However, the core of the process remains the same.
- Set out all the materials you will need for your project (see equipment list above). Make sure everything has been washed in hot soapy water and is clean ahead of time (including the jars, lids and bands).
- Warm up the jars. There are several ways to do this, but I usually fill the jars about half full with water and put them in the microwave for 4 or 5 minutes.
- Prepare the water bath canner. Put the canning rack in the bottom of the stock pot or water bath canner, and fill the pot about half full with water, and about a 1/4 cup of white vinegar, and bring to a slow boil.
- Warm up the lids. Put the lids in the canning lid rack and place it in a small pot of water on the stove that is at a simmer. There should be enough water in the pot to cover the lids. They claim that this step is optional, but in my recent experience, I have better luck when I do NOT skip this step.
- Prepare the food. Use a tested recipe that has been proven safe for water bath canning, and prepare the food for the jars.
- Put the food in the jars. When the food is ready, use the funnel to put the food into the jars. Be sure to leave the appropriate headspace, or space at the top of the jar (the amount depends on the type of food and should be specified in the recipe). You can use the bubble remover by sliding down the inside edge of the jar in various places to release trapped air.
- Put the lids on the jars. Use a wet cloth or paper towel and make sure the rim of the jar is very clean. Then use your magnetic lid lifter to get a lid out of the small pot on the stove, and place it on top of the jar. Screw the band onto the jar. Tighten the band "fingertip tight" (that is use your fingertips and screw the lid down until it is solid, but do not force the lid on tighter than that).
- Put the jars in the pot. Use your jar lifter to carefully place each jar into the boiling water in the water bath canner. Once all the jars are in the pot, be sure that there is enough water in the pot to cover the top of the jars by at least 1 to 2 inches, then place the lid on top.
- Bring to a boil, then start timer. Once everything is in the pot, and the water has come back up to a rapid boil, you can start the timer. The amount of time that you should water bath the jars depends on what kind of food you are canning and your altitude, and should be specified in the recipe or instructions.
- Remove jars and allow to cool. Once the time is up, turn the heat off and take the lid off the pot and let the jars sit for 5 minutes. Then, use the jar lifter to carefully take each jar out and place them on a thick towel on the counter.
- Listen for the pop! Leave the jars alone on the counter for between 12 to 24 hours to cool and seal. You will hear the jars seal with a pop (such a sweet sound).
- Check the lids and clean the jars. Once you are sure the sealing process is over, check each lid by pressing down in the middle of the lid to make sure it doesn't flex up and down. If it is well-sealed, the lid should be pulled down tight. In the rare case where a jar did not seal, you can either reprocess itimmediately or just store it in the refrigerator and use it within a week or two. Be sure to remove the bands and wash the jars that did seal before you put them away. It is your choice whether you store the jars with bands on or off. I do not store the bands on the jars because I feel like it is easier to tell if a jar becomes unsealed if the band is not on it.
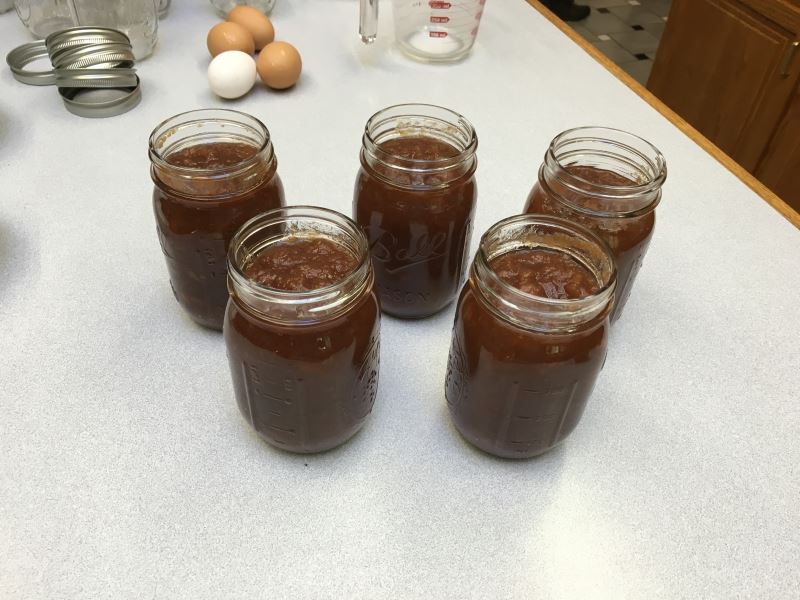
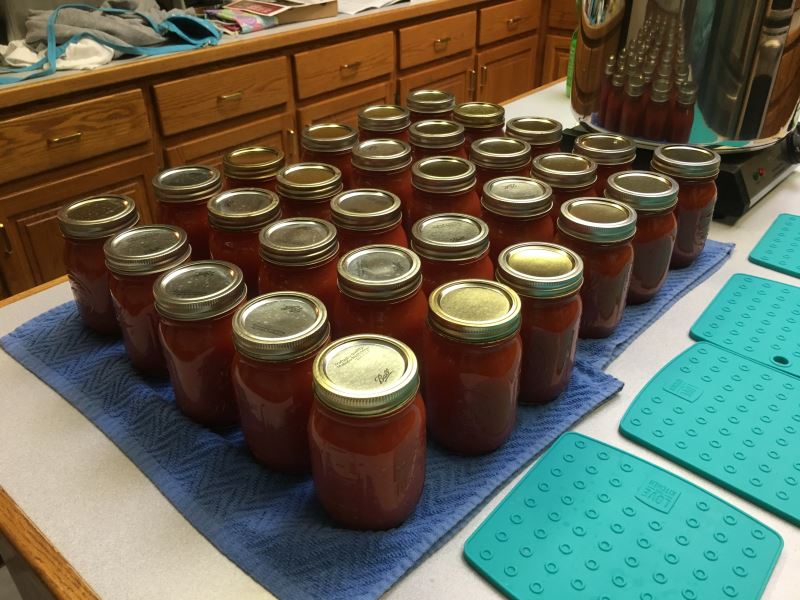
My Experiences
Here are the items that I have water bath canned in the past.
|
|
|
|
Steam Canning |
|
Equipment Needed
|
|
I suggest you do your own research to find the best deals in your area on the equipment you will need. I ordered my steam canner from Amazon, along with the canning lid rack. I chose the particular model of steam canner that I have because it can also be used as a water bath canner or just as a stock pot. I happened to see a kit that contained the jar lifter, funnel, magnetic lid lifter, and bubble remover at a local Kmart on sale. In my area, the cheapest place to get jars is at Kmart or Target. They are often on sale and it is easy to get a good deal. You will also want to think about what you want to can, and which size jar best fits your needs (depending on how you will use the product), along with safe recommendations. For example, they recommend that you can chili with beans in pint size instead of quart, however, you may want to can soups in pint size jars for lunches. Another thing to consider is whether regular mouth or wide mouth jars are best for what you're canning. Finally lids and bands will come with your jars, and you can reuse the jars and bands, but not the lids. So it's a good idea to have an extra few packs of lids on hand as well.
Foods you can Steam Can
You can use steam canning to process any high-acid food that calls for water bath canning, except for foods that require greater than 45 minutes of processing time (those would still need the water bath instead of the steam canner).
Processing
Everyone has their own preferences and style when it comes to the details of actually processing the food in the steam canner. However, the core of the process remains the same.
- Set out all the materials you will need for your project (see equipment list above). Make sure everything has been washed in hot soapy water and is clean ahead of time (including the jars, lids and bands).
- Warm up the jars. There are several ways to do this, but I usually fill the jars about half full with water and put them in the microwave for 4 or 5 minutes.
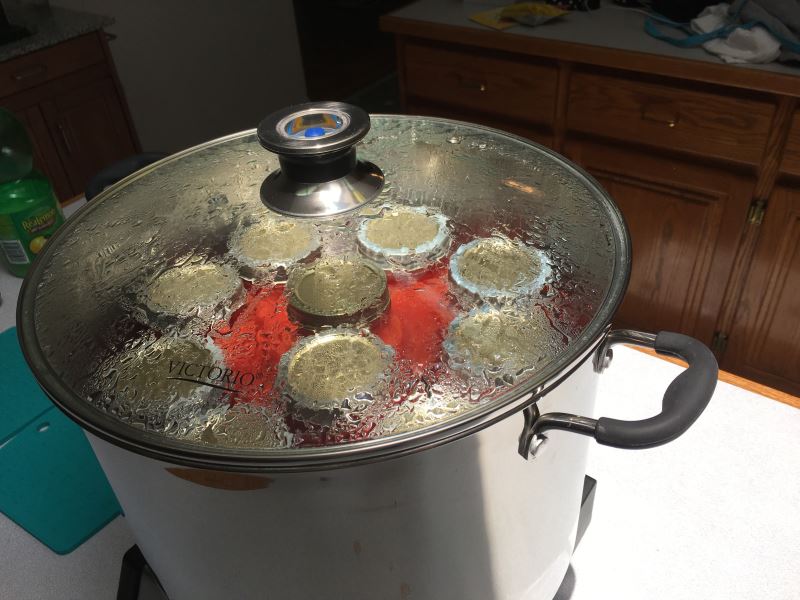
- Prepare the steam canner. Follow the instructions that came with your steam canner, but be sure to place the rack in the bottom of the pot in the correct position for steam canning. Fill the pot with 3 quarts of water (or the amount specified for your particular model of canner), and about 1/4 cup of white vinegar. The water level should be just below the top of the rack. Bring the water to a simmer.
- Warm up the lids. Put the lids in the canning lid rack and place it in a small pot of water on the stove that is at a simmer. There should be enough water in the pot to cover the lids. They claim that this step is optional, but in my recent experience, I have better luck when I do NOT skip this step.
- Prepare the food. Use a tested recipe that has been proven safe for water bath or steam canning, and prepare the food for the jars.
- Put the food in the jars. When the food is ready, use the funnel to put the food into the jars. Be sure to leave the appropriate headspace, or space at the top of the jar (the amount depends on the type of food and should be specified in the recipe).You can use the bubble remover by sliding down the inside edge of the jar in various places to release trapped air.
- Put the lids on the jars. Use a wet cloth or paper towel and make sure the rim of the jar is very clean. Then use your magnetic lid lifter to get a lid out of the small pot on the stove, and place it on top of the jar. Screw the band onto the jar. Tighten the band "fingertip tight" (that is use your fingertips and screw the lid down until it is solid, but do not force the lid on tighter than that).
- Put the jars in the pot. Use your jar lifter to carefully place each jar into the steam canner, then place the lid on top.
- Bring to a boil, then start timer. Bring the water to a rapid boil. When the needle on the gauge reaches the green area for your "zone" (depending on your altitude), start the timer.The amount of time that you should steam bath the jars depends on what kind of food you are canning and your altitude, and should be specified in the recipe or instructions. The processing time for steam canning is the same as the processing time for water bath canning. Keep an eye on the canner to ensure the water continues to boil the entire time and the needle does not drop below the green portion for your zone.
- Remove jars and allow to cool. Once the time is up, turn the heat off and take the lid off the pot and let the jars sit for 5 minutes. Then, use the jar lifter to carefully take each jar out and place them on a thick towel on the counter.
- Listen for the pop! Leave the jars alone on the counter for between 12 to 24 hours to cool and seal. You will hear the jars seal with a pop (such a sweet sound).
- Check the lids and clean the jars. Once you are sure the sealing process is over, check each lid by pressing down in the middle of the lid to make sure it doesn't flex up and down. If it is well-sealed, the lid should be pulled down tight. In the rare case where a jar did not seal, you can either reprocess itimmediately or just store it in the refrigerator and use it within a week or two. Be sure to remove the bands and wash the jars that did seal before you put them away. It is your choice whether you store the jars with bands on or off. I do not store the bands on the jars because I feel like it is easier to tell if a jar becomes unsealed if the band is not on it.
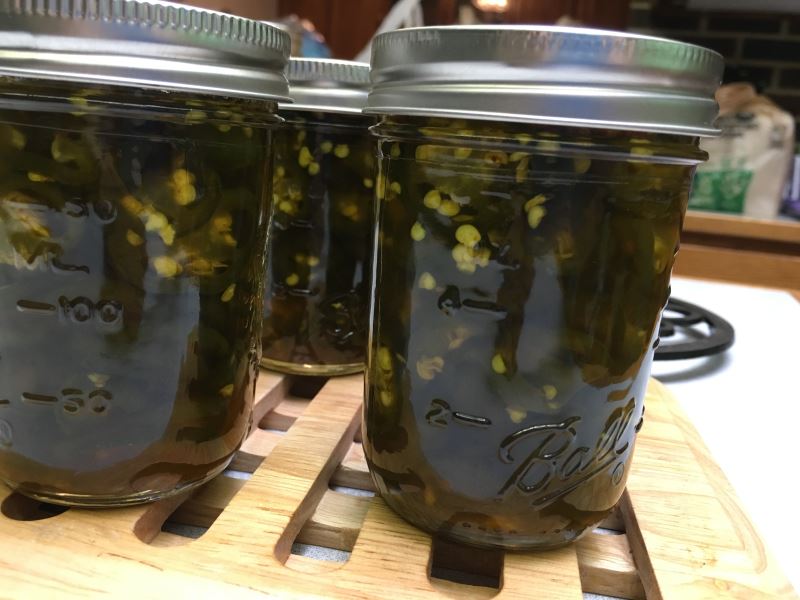
My Experiences
Here are the items that I have steam canned in the past.
|
|
|
|
Pressure Canning |
|
Equipment Needed
|
|
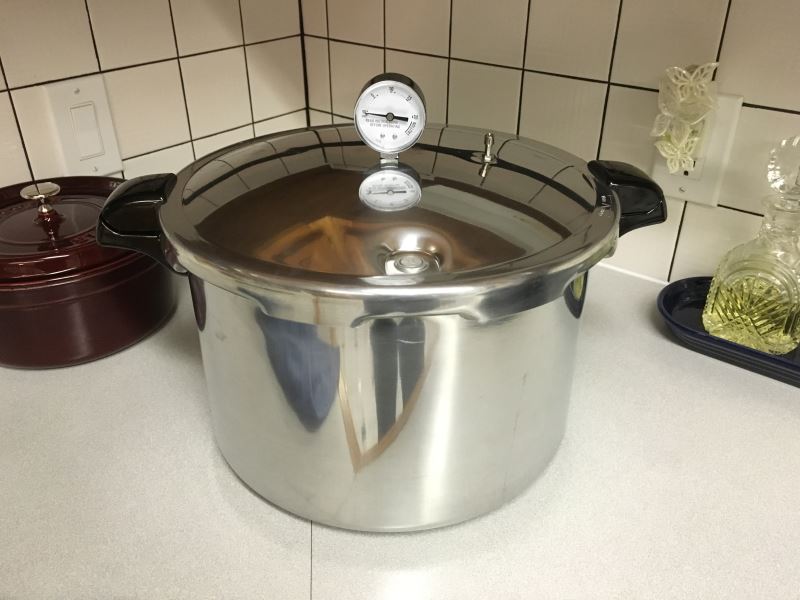
I suggest you do your own research to find the best deals in your area on the equipment you will need. I ordered my pressure canner from Amazon, along with the canning lid rack and pressure regulator. There is a variety of pressure canners to choose from, but the biggest decision you will need to make is which size to get. I am happy with the 16-quart - it does everything that I need and it is not as difficult to carry or store as a larger size. However, this is completely a personal preference. I happened to see a kit that contained the jar lifter, funnel, magnetic lid lifter, and bubble remover at a local Kmart on sale. In my area, the cheapest place to get jars is at Kmart or Target. They are often on sale and it is easy to get a good deal. You will also want to think about what you want to can, and which size jar best fits your needs (depending on how you will use the product), along with safe recommendations. For example, they recommend that you can chili with beans in pint size instead of quart, however, you may want to can soups in pint size jars for lunches. Another thing to consider is whether regular mouth or wide mouth jars are best for what you're canning. Finally lids and bands will come with your jars, and you can reuse the jars and bands, but not the lids. So it's a good idea to have an extra few packs of lids on hand as well.
Foods you can Pressure Can
Only foods with a low acidic content need to be pressure canned. This includes the following:
- Vegetables
- Meats (beef, chicken, pork, seafood, etc)
- Soups or stews (even if there are high-acid ingredients, like tomatoes, in it)
- Stocks
Processing
Everyone has their own preferences and style when it comes to the details of actually processing the food in the pressure canner. However, the core of the process remains the same.
- Set out all the materials you will need for your project (see equipment list above). Make sure everything has been washed in hot soapy water and is clean ahead of time (including the jars, lids and bands).
- Warm up the jars. There are several ways to do this, but I usually fill the jars about half full with water and put them in the microwave for 4 or 5 minutes.
- Prepare the pressure canner. Follow the instructions that came with your pressure canner, but be sure to place the rack in the bottom of the pot, and fill the pot with 2 to 3 inches of water, or to the mark in the pot if there is one, and about 1/4 cup of white vinegar. Bring the water to a simmer.
- Warm up the lids. Put the lids in the canning lid rack and place it in a small pot of water on the stove that is at a simmer. There should be enough water in the pot to cover the lids. They claim that this step is optional, but in my recent experience, I have better luck when I do NOT skip this step.
- Prepare the food. Use a tested recipe that has been proven safe for pressure canning, and prepare the food for the jars.
- Put the food in the jars. When the food is ready, use the funnel to put the food into the jars. Be sure to leave the appropriate headspace, or space at the top of the jar (the amount depends on the type of food and should be specified in the recipe).You can use the bubble remover by sliding down the inside edge of the jar in various places to release trapped air.
- Put the lids on the jars. Use a wet cloth or paper towel and make sure the rim of the jar is very clean. Then use your magnetic lid lifter to get a lid out of the small pot on the stove, and place it on top of the jar. Screw the band onto the jar. Tighten the band "fingertip tight" (that is use your fingertips and screw the lid down until it is solid, but do not force the lid on tighter than that).
- Put the jars in the pot. Use your jar lifter to carefully place each jar into the pressure canner, then place the lid on top. Lock the lid in place, keeping the vent open.
- Bring to a boil, then start timer. Adjust the heat on the stove to medium-high and once there is a steady stream of steam escaping from the vent, allow 10 minutes to ensure all the air is out of the canner. Then, carefully place the weight on the vent (I use tongs to ensure my fingers stay well away from the steam). Wait for the pressure gauge to come up to pressure, and thenstart the timer.The pressure you use and the amount of time that you should process the jars depends on what kind of food you are canning and your altitude, and should be specified in the recipe or instructions. Keep an eye on the canner to ensure that the pressure does not drop below the recommended level (it is okay if it goes a little higher). I have found that it is easier to use a pressure regulator than the gauge since a regulator actually helps to keep the pressure at the correct level and is easy to monitor. If you are using a regulator, be sure there is some constant movement - it should be rocking back and forth several times a minute.
- Depressurize the canner. Once the time is up, turn the heat off and remove the canner from the burner. Allow the canner to naturally dispelthe pressure until the pressure is at zero.
- Remove jars and allow to cool. Wait an additional 10 minutes, and remove the lid. Let the jars sit for 5 minutes, then use the jar lifter to carefully take each jar out and place them on a thick towel on the counter.
- Listen for the pop! Leave the jars alone on the counter for between 12 to 24 hours to cool and seal. You will hear the jars seal with a pop (such a sweet sound).
- Check the lids and clean the jars. Once you are sure the sealing process is over, check each lid by pressing down in the middle of the lid to make sure it doesn't flex up and down. If it is well-sealed, the lid should be pulled down tight. In the rare case where a jar did not seal, you can either reprocess itimmediately or just store it in the refrigerator and use it within a week or two. Be sure to remove the bands and wash the jars that did seal before you put them away. It is your choice whether you store the jars with bands on or off. I do not store the bands on the jars because I feel like it is easier to tell if a jar becomes unsealed if the band is not on it.
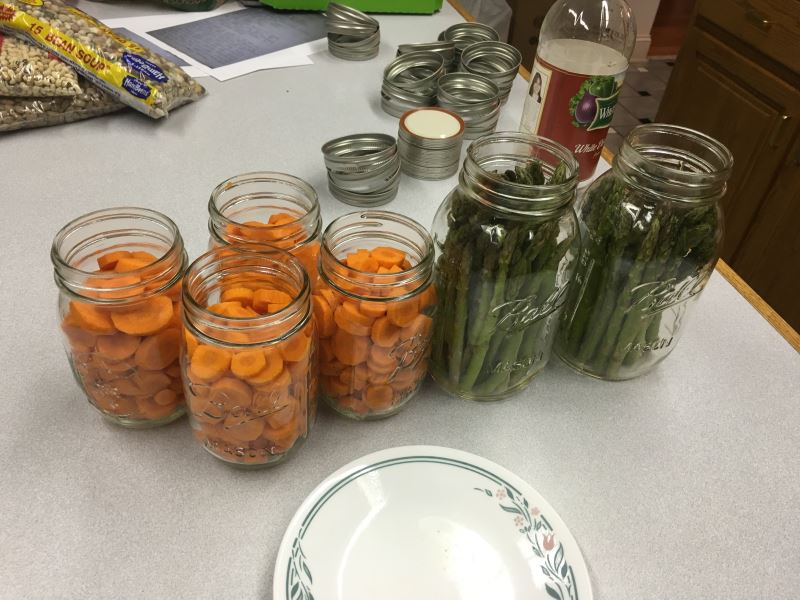
My Experiences
Here are the items that I have pressure canned in the past.
|
|
|
|
Common Questions & Answers |
|
For the most part, they say that home-canned food is good for up to 1 to 2 years. However, most food will stay safe for consumption for many years, but after a couple years the quality of the flavor and appearance begins to deteriorate (usually very slowly and barely noticeable).
Is there anything you cannot can?
Yes. When in doubt – ask a reliable source like your local extension office, or the experts at the very protective group on the Canning Facebook page. The following is a list of foods that cannot be safely canned for various reasons, but mainly because the process does not safely and reliably kill all the dangerous bacteria that can get into the food.
- Fats (oils, mayonnaise, etc)
- Dairy (butter, milk, cheese, cream, etc)
- Grains/pasta/bread
- Eggs
- Thickeners (cornstarch, flour, etc)
- Some vegetables (unless pickled):
- broccoli
- brussel sprouts
- cabbage
- cauliflower
- eggplant
- summer squash
- olives
- lettuce
- artichokes
- any mashed food (potatoes, squash, pumpkin, etc)
No. Any pot that is large enough to cover the jars by 1 to 2 inches of water while boiling (and has a calid) will work. Don't forget to put a rack of some kind at the bottom of the pot so the jars of food do not make direct contact with the heat at the bottom of the pot.
Do I need to buy a special pressure canner?
Yes. Pressure canners are specifically designed for the job of canning food safely. Other devices, such as pressure cookers, may even advertise on the box that they can be used for canning, but that is not true. They do not always get to or maintain an internal temperature that is high enough to kill the bacteria; therefore, it is recommended to only use pressure canners that are specifically manufactured for that purpose. Presto and All American and the two most popular brand names when it comes to pressure canners.
Why warm the jars before putting food in them?
You will want to be sure that the jars are warm and that you are putting warm food into a warm jar before putting it into the canner. Putting warm food into a cold jar or cold food and jar into a warm canner can cause a temperature shock to the jar and it is likely that the jar will fail and break during processing. Always put warm food into a warm jar before putting everything into the warm canner.
Why warm the lids before sealing the jars?
This is optional. Ball has released a statement saying that warming the lids before use is no longer a required step. They have used a material for the seal that no longer requires pre-heating. However, I have done it both ways and I have had less seals fail when I pre-heat them. Pre-heating the lids make the seals a little softer and the jars set into the seal better.
Why put white vinegar in the canner?
White vinegar keeps the water in the pot from discoloring the pot during use. It does not alter the food or jars at all, it just prevents the inside of your canners or pots from becoming discolored by the minerals in the water.
|
|
Online Resources |
|
- Ball → www.freshpreserving.com
- National Center for Food Preservation → nchfp.uga.edu
- Healthy Canning → www.healthycanning.com
- Canning Facebook Group → Canning
|
|
Published Resources |
|
- Ball Blue Book Guide to Preserving
- Ball Complete Book of Home Preserving
- The All New Ball Book of Canning and Preserving